How to Tie a Figure 8 Knot for Rock Climbing
One of the most fundamental skills you must know to start rock climbing is how to tie certain knots like the figure 8. The figure 8 knot is one of the most common knots for connecting the climber to the rope because it is extremely strong and reliable. A strong and reliable knot is necessary because the knot is the only thing preventing you from falling from large heights while climbing. This tutorial will teach you how to tie a figure 8 knot on a flat surface. After repeating this process a few times and getting used to the pattern, you will be able to tie the knot in situations without a flat surface.
What You’ll Need
- A climbing rope of around 10mm in diameter
- Warning: Always inspect your rope for bulges, tears, or other abnormalities before climbing. Climbing on a damaged rope could result in death.
- A harness newer than 7 years old
- Warning: Using a harness older than 7 years could result in death. The materials that harnesses are made of will degrade after this period.
- A large flat surface
Common Terms
- Bite: A section of rope in the shape of an upside down U.
- Soft Points: The two holes of a climbing harness meant for soft materials (like rope) to pass through.
Tying the Figure 8 Knot
| 1. Find the tail end of your rope and lay it on a flat surface with the tail to the right. |  |
| 2. Measure about 3 and ½ feet from the tail end of the rope. Use your fingers to mark where this measurement is. Note: Depending on the diameter of rope, 3 and ½ feet may be too much or too little. Adjust as needed. |  |
| 3. Create a bite of rope while continuing to hold the marked point at the top of the rope. |  |
| 4. While continuing to hold the top of the rope, flip the left side of the rope over the right to create a twist in the rope. | 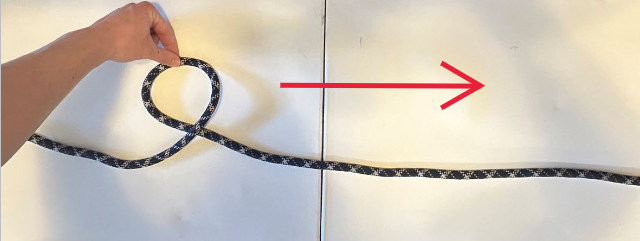 |
| 5. Repeat step 4 to twist the rope in the same direction again. | 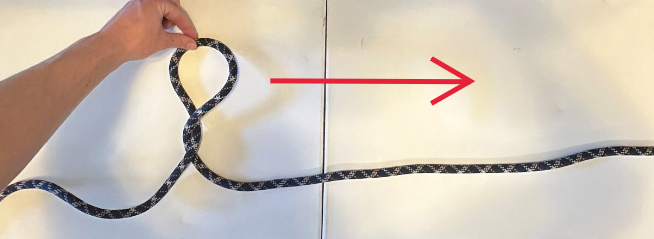 |
| 6. Continue holding the top of the rope and thread the tail end of the rope through the front of the top hole. This is the hole below your fingers. | 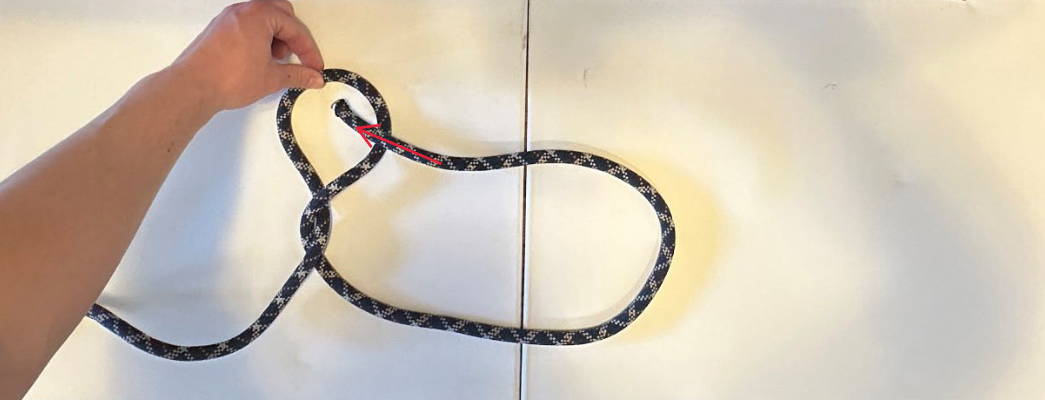  |
| 7. Position the knot so the tail end is closest to you. |  |
| 8. Thread the tail end of the rope through the soft points of your climbing harness from bottom to top. Warning: Be sure that you’ve passed the rope through both soft points of the harness. If the rope isn’t through both points then the connection could fail. | 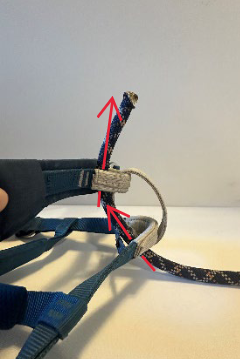 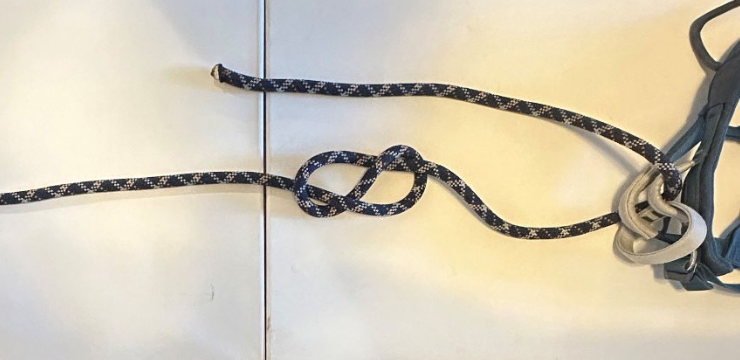 |
| 9. Thread the knot back into the hole where the tail end came out of. Note: Using the smaller of the two holes will result in a cleaner-looking knot which is easier to unknot when you are done. | 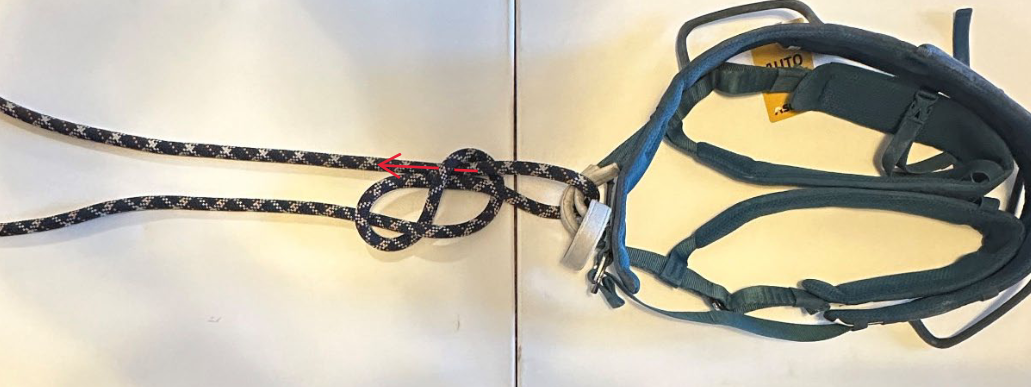 |
| 10. Follow the path of the rope back through the knot until you’ve passed back through all of the loops and the rope comes out of the other side. Note: The end of the rope that you’re threading through will always stay next to the same piece of rope. |  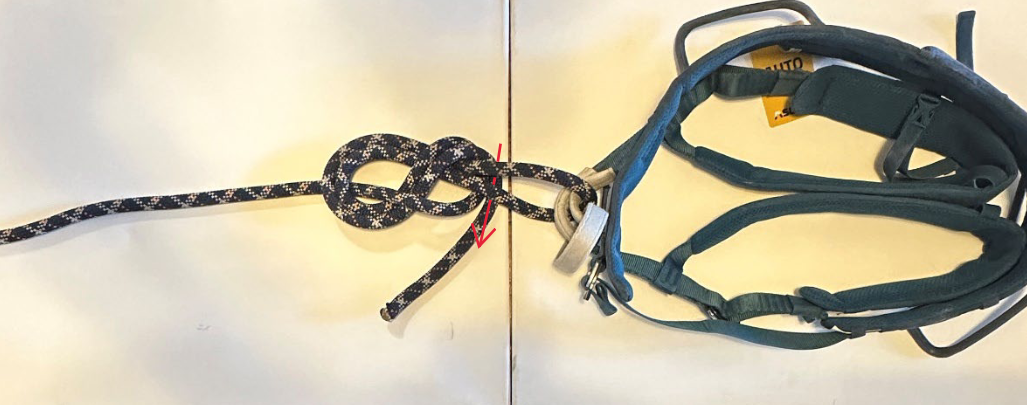  |
| 11. Check that the knot was tied correctly by counting the pairs of rope that you can see when looking at the knot. There should be 5 pairs. |  |
| 12. If you do not see 5 pairs of rope, undo the knot and retie it from step 1. Warning: Do not use a knot that is tied incorrectly. Faults in the knot could result in casualties from the knot failing while being weighted. | |
| 13. If necessary, move the top section of the rope from the back to the front as shown in the image below. | 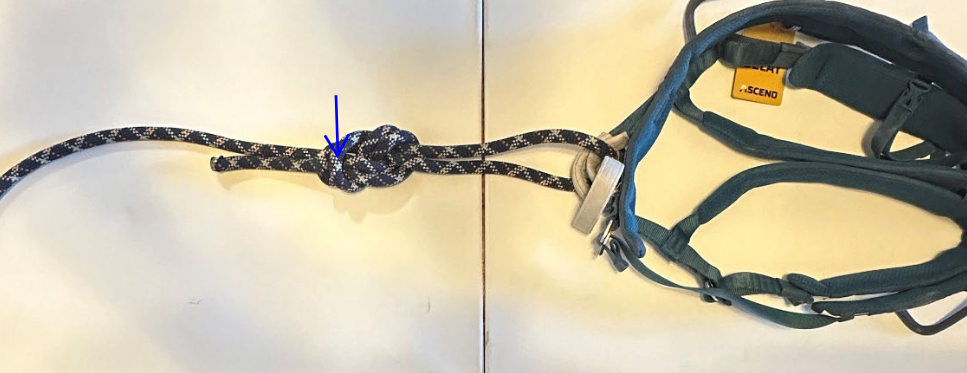 |
| 14. Check that there are 5 to 10 inches of extra rope at the end of your knot. If not, return to step two and adjust your measurement. If the extra rope is less than 5 inches, measure out a bit more rope. If the extra rope is more than 10 inches, measure out a bit less rope. | 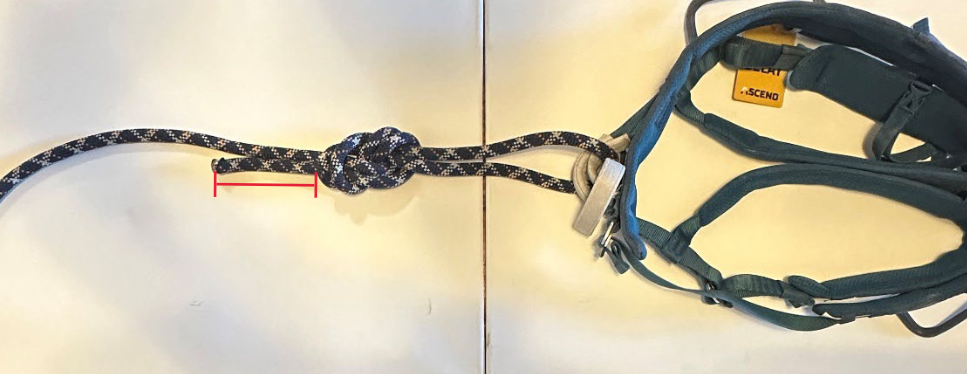 |
| 15. Assuming your harness is on correctly (not a part of this tutorial) and you have a knowledgeable belay partner, you’re now ready to climb! | |
| Here are a few helpful tips to remember when tying the knot in the future: – Always double-check your knot by counting the number of pairs of rope you see. If you don’t see 5 pairs, retie the knot. Have your belay partner check the knot too! – Following the rope back through the knot (step 10) can be confusing at times, so try to remember to retrace the path that is already in the knot. |
